Intro
Flask is a versatile microframework capable of doing just about anything that you ask of it. Flask ships with Jinja2 as its HTML Templating Engine, and when combined with SQLAlchemy, provides full-stack development support that rivals bulkier framework (like Django).
All that said, I believe Flask’s best characteristic to be its ‘microframework’ status: there are many add-ons and extensions which can be utilized “a la carte”, rather than “out of the box”. This means multiple solutions to single problems, which almost always leads to better solutions in the open-source community. The “slim” nature of the framework also makes bootstrapping projects easier, with much less boilerplate code & dogmatic “best-practices”.
In the first step, we will use Tweepy, and Flask’s core to build a quick dashboard to view a user’s Twitter Activity. In Part II, we will explore SQLAlchemy and Flask-restless to create an API to harvest & archive Tweets in a database.
I will be using Python 3.6 (faster dictionaries, default utf-8 strings, etc.), but feel free to follow along with any flavor of Python (some people don’t like to let go…)
Setup our workspace
Important: If you don’t know what a Python virtual environment is, read about them here before continuing!
mkdir tweet-harvester
cd tweet_harvester
python -m venv env
# Or 'virtualenv env' to start a NEW project with OLD tools
source env/bin/activate
mkdir tweet_harvester
touch tweet_harvester/__init__.py run.py config.py
Your directory structure should look like:
tweet_harvester/
    tweet_harvester/
        __init__.py
    run.py
    config.py
    env/
Install dependencies with pip
pip install flask tweepy flask-restless
Hello World from Flask
- Open up the
__init__.pyfile created in step (1), entering the following content:
from flask import Flask
# Instantiate our app...
# Name it the '__name__' of this module (tweet-harvest)
app = Flask(__name__)

# Later, we will store our Twitter tokens/keys
# in config.py...we load our config here.
app.config.from_object('config')

# We define our URL route, and the controller to handle requests
@app.route('/')
def hello_world():
    return '<h1>Hello World</h1>'
- Next open the
run.pyfile created earlier, inserting the following content:
from tweet_harvester import app
# 'app' originates from the line 'app = Flask(__name__)'
app.run(port=8080)
- Finally, start the server
Important: The Flask development server should never be used in Production environments, nor should app.config['DEBUG'] == True in Production. In Production, you’d want to wrap your Flask application with a WSGI server, like Gunicorn
python run.py
…and open up your web browser to http://localhost:8080/, and verify our Hello World test.
Hello World with Flask is easy. Setting up and configuring a project is often one of the most difficult tasks when developing on the full-stack, as you only do it a handful of times each year (think about it!). Flask (and Python) make this hurdle an easy one to leap.
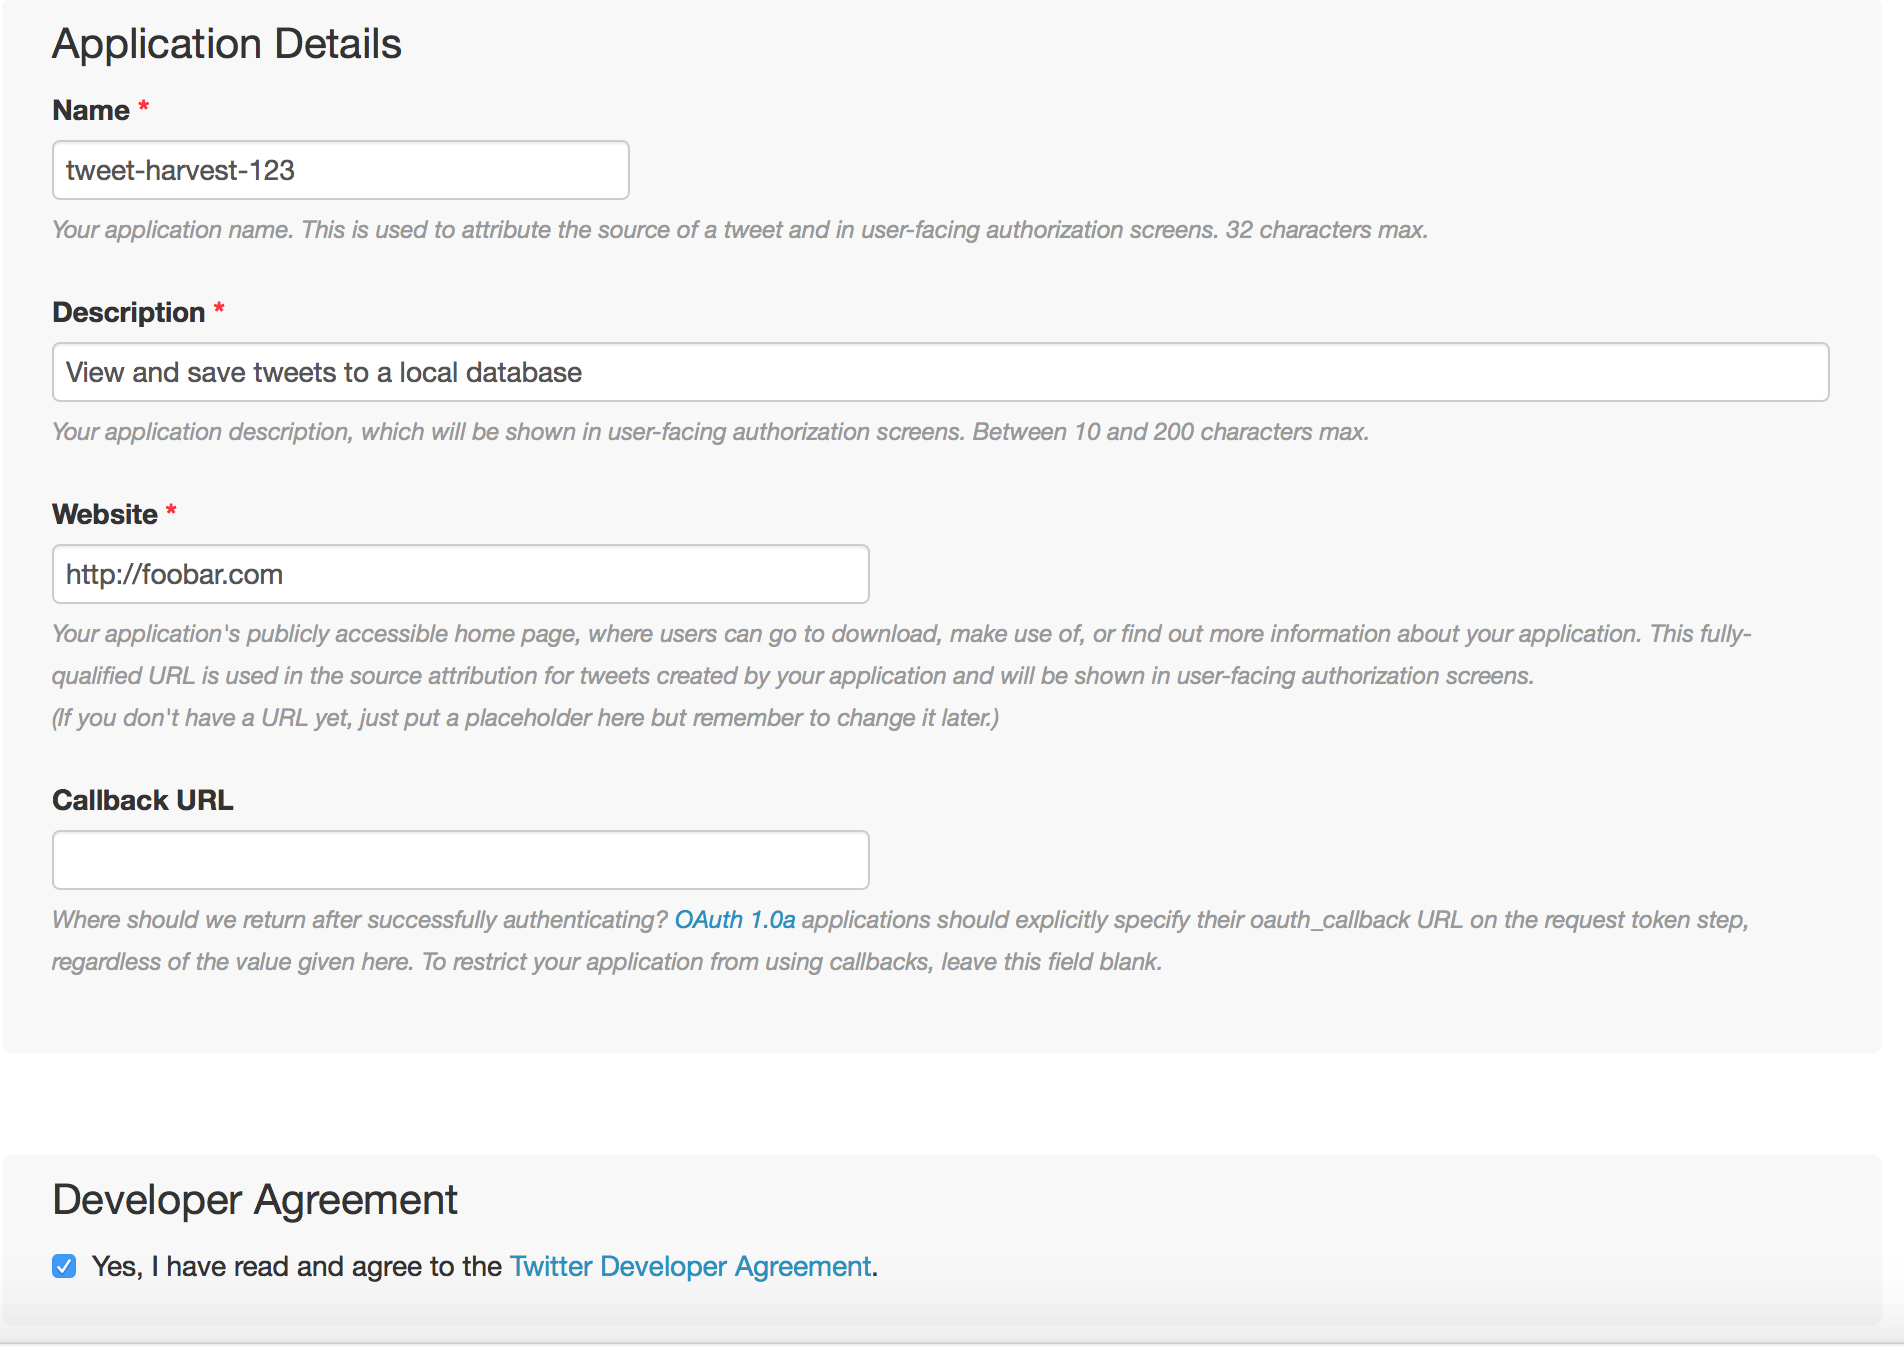
Create a new Twitter Application, Tokens and Keys
- Navigate to https://apps.twitter.com, and sign in with existing Twitter credentials, or make a new account.
- Click Create New App ( or just click here )
- Enter a Name, a Description, and for Website enter http://foobar.com (as this does not matter for the time being). Leave the Callback URL blank. Accept the developer terms, and click Create your Twitter application.
- On the resulting screen after app creation, navigate to the Keys and Access Tokens tab. Scroll down to Your Access Token, and click the Create my access token button.
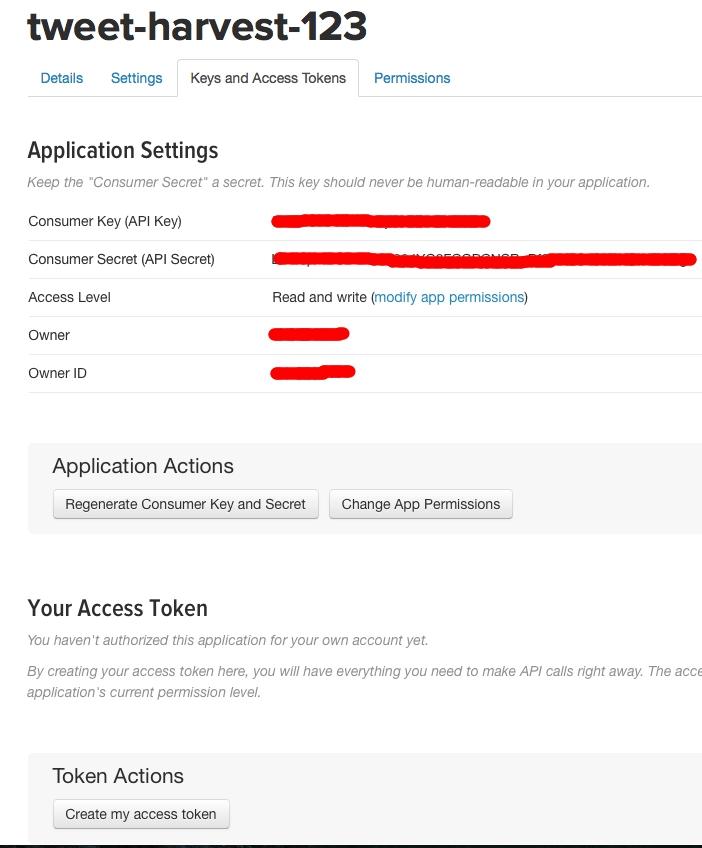
- Once these tokens generate (should take a second or 2), you’ll want to use them in the next step.
Deploy our Twitter Activity Dashboard
- Create Twitter Environment Variables in
~/.bash_profile.
This file gets loaded every time your user account starts a new shell. For system-wide variables, enter data into /etc/profile.
Your ~/.bash_profile or /etc/profile should contain:
EXPORT TWITTER_CONSUMER_KEY=your_consumer_key_here
EXPORT TWITTER_CONSUMER_SECRET=your_consumer_secret_here
EXPORT TWITTER_ACCESS_TOKEN=your_access_token_here
EXPORT TWITTER_ACCESS_TOKEN_SECRET=your_access_token_secret_here
IMPORTANT! After saving this file, run the following command to load your new ENV variables:
source ~/.bash_profile
# or "source /etc/profile"
- Load these Environment Variables into
config.py:
We want to load these from our Environment, rather than pasting the codes directly into config.py for obvious security reasons.
import os

DEBUG = True
# Enable stacktrace & debugger in web browser
TWITTER_CONSUMER_KEY = os.environ['TWITTER_CONSUMER_KEY']
TWITTER_CONSUMER_SECRET = os.environ['TWITTER_CONSUMER_SECRET']
TWITTER_ACCESS_TOKEN = os.environ['TWITTER_ACCESS_TOKEN']
TWITTER_ACCESS_TOKEN_SECRET = os.environ['TWITTER_ACCESS_TOKEN_SECRET']
- Update
__init__.pyby adding Twitter authentication
from flask import Flask, json, request
import tweepy

app = Flask(__name__)
# Load our config from an object, or module (config.py)
app.config.from_object('config')

# These config variables come from 'config.py'
auth = tweepy.OAuthHandler(app.config['TWITTER_CONSUMER_KEY'],
                           app.config['TWITTER_CONSUMER_SECRET'])
auth.set_access_token(app.config['TWITTER_ACCESS_TOKEN'],
                      app.config['TWITTER_ACCESS_TOKEN_SECRET'])
tweepy_api = tweepy.API(auth)

@app.route('/')
def hello_world():
    return "<h1>Hello World</h1>"
- Define our
get_tweets()function in__init__.py
def get_tweets(username):
    tweets = tweepy_api.user_timeline(screen_name=username)
    return [{'tweet': t.text,
              'created_at': t.created_at,
              'username': username,
              'headshot_url': t.user.profile_image_url}
           for t in tweets]
- Create
templates/andtweets.html
This HTML file will render the data obtained in the get_tweets() function above. Note that we load Bootstrap 4 (alpha-release) from maxcdn.
<!-- templates/tweets.html -->
<html lang="en">
  <head>
    <meta charset="utf-8">
    <meta name="viewport" content="width=device-width, initial-scale=1, shrink-to-fit=no">

    <title>Tweet Harvester</title>

    <!-- Bootstrap 4 Stuff https://v4-alpha.getbootstrap.com/  -->
    <link rel="stylesheet"
          href="https://maxcdn.bootstrapcdn.com/bootstrap/4.0.0-alpha.6/css/bootstrap.min.css"
          integrity="sha384-rwoIResjU2yc3z8GV/NPeZWAv56rSmLldC3R/AZzGRnGxQQKnKkoFVhFQhNUwEyJ"
          crossorigin="anonymous">
    <!-- End Bootstrap 4 stuff -->
  </head>
  <body>
    <div class="container">
      <h1 class="p-3">Tweet Harvester</h1>
      {% for tweet in tweets %}
      <div class="list-group">
         <a href="#" class="list-group-item list-group-item-action flex-column align-items-start">
           <div class="d-flex w-100 justify-content-between">
             <img src="{{tweet.headshot_url}}" class="w-12 p-1 float-left image-thumbnail">
             <h5 class="ml-10 w-75 mb-1">{{ tweet.tweet }}</h5>
             <small>{{ tweet.created_at }}</small>
           </div>
         </a>
      </div>
      {% endfor %}

    </div>
  </body>
</html>
Your directory structure should look like:
tweet_harvester/
    tweet_harvester/
        __init__.py
        templates/
            tweets.html
    run.py
    config.py
    env/
- Add route and controller to
__init__.pyto render this template
We get the username parameter below directly from the URL with the /<string:username> segment of our route’s URL. We then pass it to the tweets(username) function.
@app.route('/tweet-harvester/<string:username>')
def tweets(username):
  # 'tweets' is passed as a keyword-arg (**kwargs)
  # **kwargs are bound to the 'tweets.html' Jinja Template context
  return render_template("tweets.html", tweets=get_tweets(username))
Flask leverages the Jinja2 Templating Engine. In our Flask controller, we return with:
return render_template(foo.html, var1=obj1, var2=obj2, varN=objN)
…with an infinite number of var=obj bindings. These bindings are passed via **kwargs to create the template’s context. This Jinja context is available anywhere within a Jinja block, where we can embed Python to modify/render values.
An example Jinja for-loop block is as follows:
<ul>
  {% for elem in var1 %}
  <li>{{elem}}</li>
  {% endfor %} )
</ul>
…which would render a list-item <li> for each elem in the list bound to var1.
- Start your server, and test with any Twitter handle
python run.py
Navigate to http://localhost:8080/tweet-harvester/realDonaldTrump to test!
Success!
You’ve succesfully deployed a simple Twitter Activity dashboard, and have gotten your hands dirty with some of Flask’s core features and concepts, namely:
- Jinja2
- Flask Routes & Controllers (Views)
- Flask Project Structure
- Starting the Flask Development Server